Chat GPT in Terminal
Chat GPT is great and provides a quick way to gain a little bit of knowledge about practically anything.
This take-home lab is designed to give you a little bit of experience with:
- Using Application Programming Interfaces (APIs)
- Creating accounts
- Dealing with API keys
- Creating a
npmproject - Creating a command line app
Steps
Install Node
Make sure you have node package manager npm and node installed on your system.
Create a Node project
mkdir chat-gpt-cli
cd chat-gpt-cli
npm init -y
code .
Install the required dependencies
- cleye: a package which makes creating typed command line interfaces super simple
- clack: a Text UI library (TUI) which allows for very nicely formatted command line output. Has prebuilt components for:
- text blocks
- input blocks
- spinners
- more
- OpenAI: OpenAI’s JavaScript wrapper1.
npm install -D cleye @clack/prompts openai
Create a file for your entrypoint
index.js is the entrypoint for your node program. However, index.js by default is not set up to parse command-line arguments. Handling these arguments requires cleye (the name of this is a pun if you have not already noticed).
import { cli } from 'cleye';
import { outro, text, spinner } from '@clack/prompts';
import OpenAI from 'openai';

const argv = cli({
  name: 'index.js',
  parameters: [
    '[arguments...]',
  ],
})

let initial_prompt = argv._.arguments.join(' ');
Arguments are an array of strings.
Because spaces define separate arguments, joining separate words together with a space is required to get back to string form.
Editing your package.json
Node does not like to use import statements unless you tell it to. To do this, you need to add a type field to your package.json file.
{
  "type": "module"
}
Getting API keys
We are going to do this a little bit backwards and explain how to get API keys into your program securely. To do this, we need to leverage environment variables. While scary-sounding, your environment variables look something like this:
Example Code:
export USERNAME=johndoe
export GITHUBAPIKEY=n83ncxz9m39a012
In my opinion, using upper case for environment variables is less readable when compared to
snake_caseorcamelCase. Using all caps is merely convention through.
These are effectively “common variables” which other programs can access. Reading an environment variable is easy and something which is accessible to all programs.
echo $GITHUBAPIKEY
const github_api_key = process.env.GITHUBAPIKEY;
Why not just store it in your code?
Why not just put the key in your code? First, having keys in your code can made updating them kind of cumbersome (changing environment variables remotely is really difficult). Second, security. You could accidentally commit your code to a public repository. One of your team members could go rouge and post it online. You could accidentally use the production api key in testing and accidentally delete your user’s data.
Committing your API key accidentally is such a large problem on sites like GitHub that automated companies will search your code for “high entropy strings” and automatically notify you if detected ( I have gotten quite a few of these emails myself).
Creating a OpenAI account
Setting up an account with a third-party service can be a bit tedious, but actually going through the motions. Got to playground.openai.com and setup an account if you have not made one already.
This technically costs money, but this particular API is comically cheap. My cost to use
gpt-3.5-turbohas been less than0.01for about150requests.
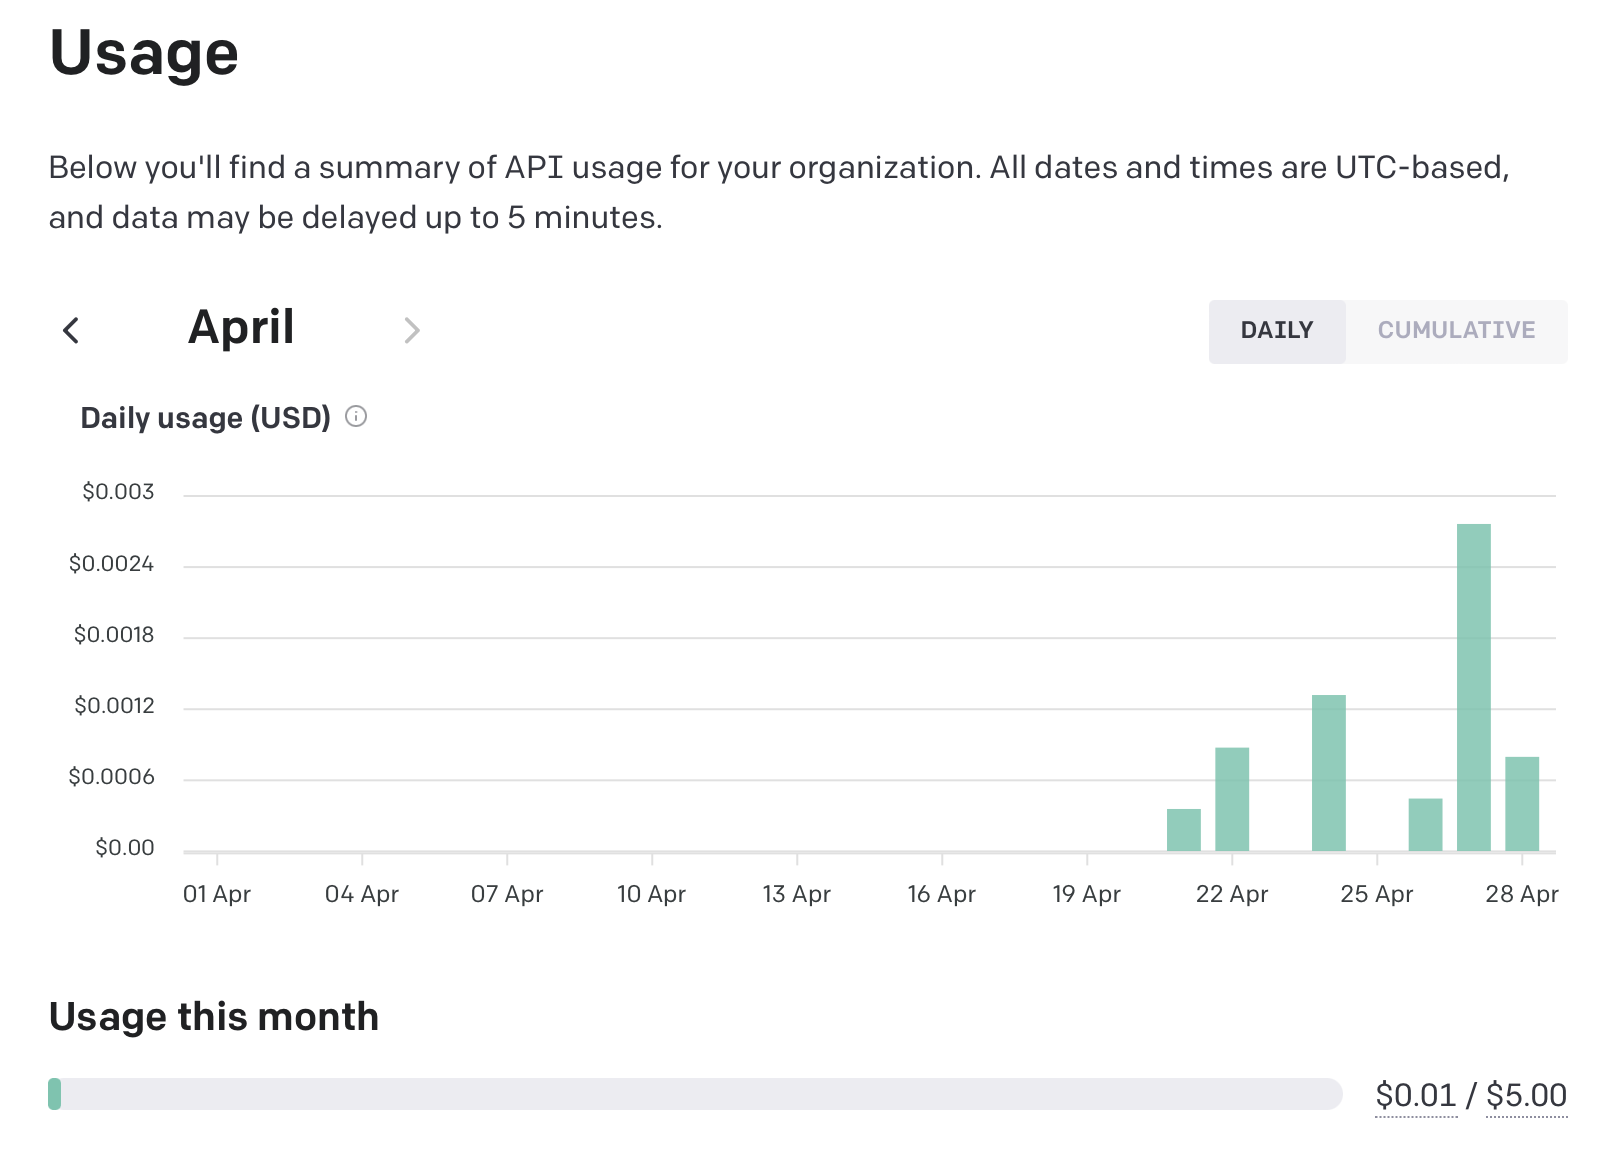
Set a limit
DO THIS. No one talks about the accidentally leaving a Web Service running to poverty pipeline. I though that $5 was reasonably fo me and adjusting this is easy in the future. If immediately losing access is a problem, setting a soft limit will give you an email when you are about to reach it.

I once left an AWS Free Tier S3 Instance on and it ended up costing my parents several hundred dollars as my parents got the email and did not know what to do with them.
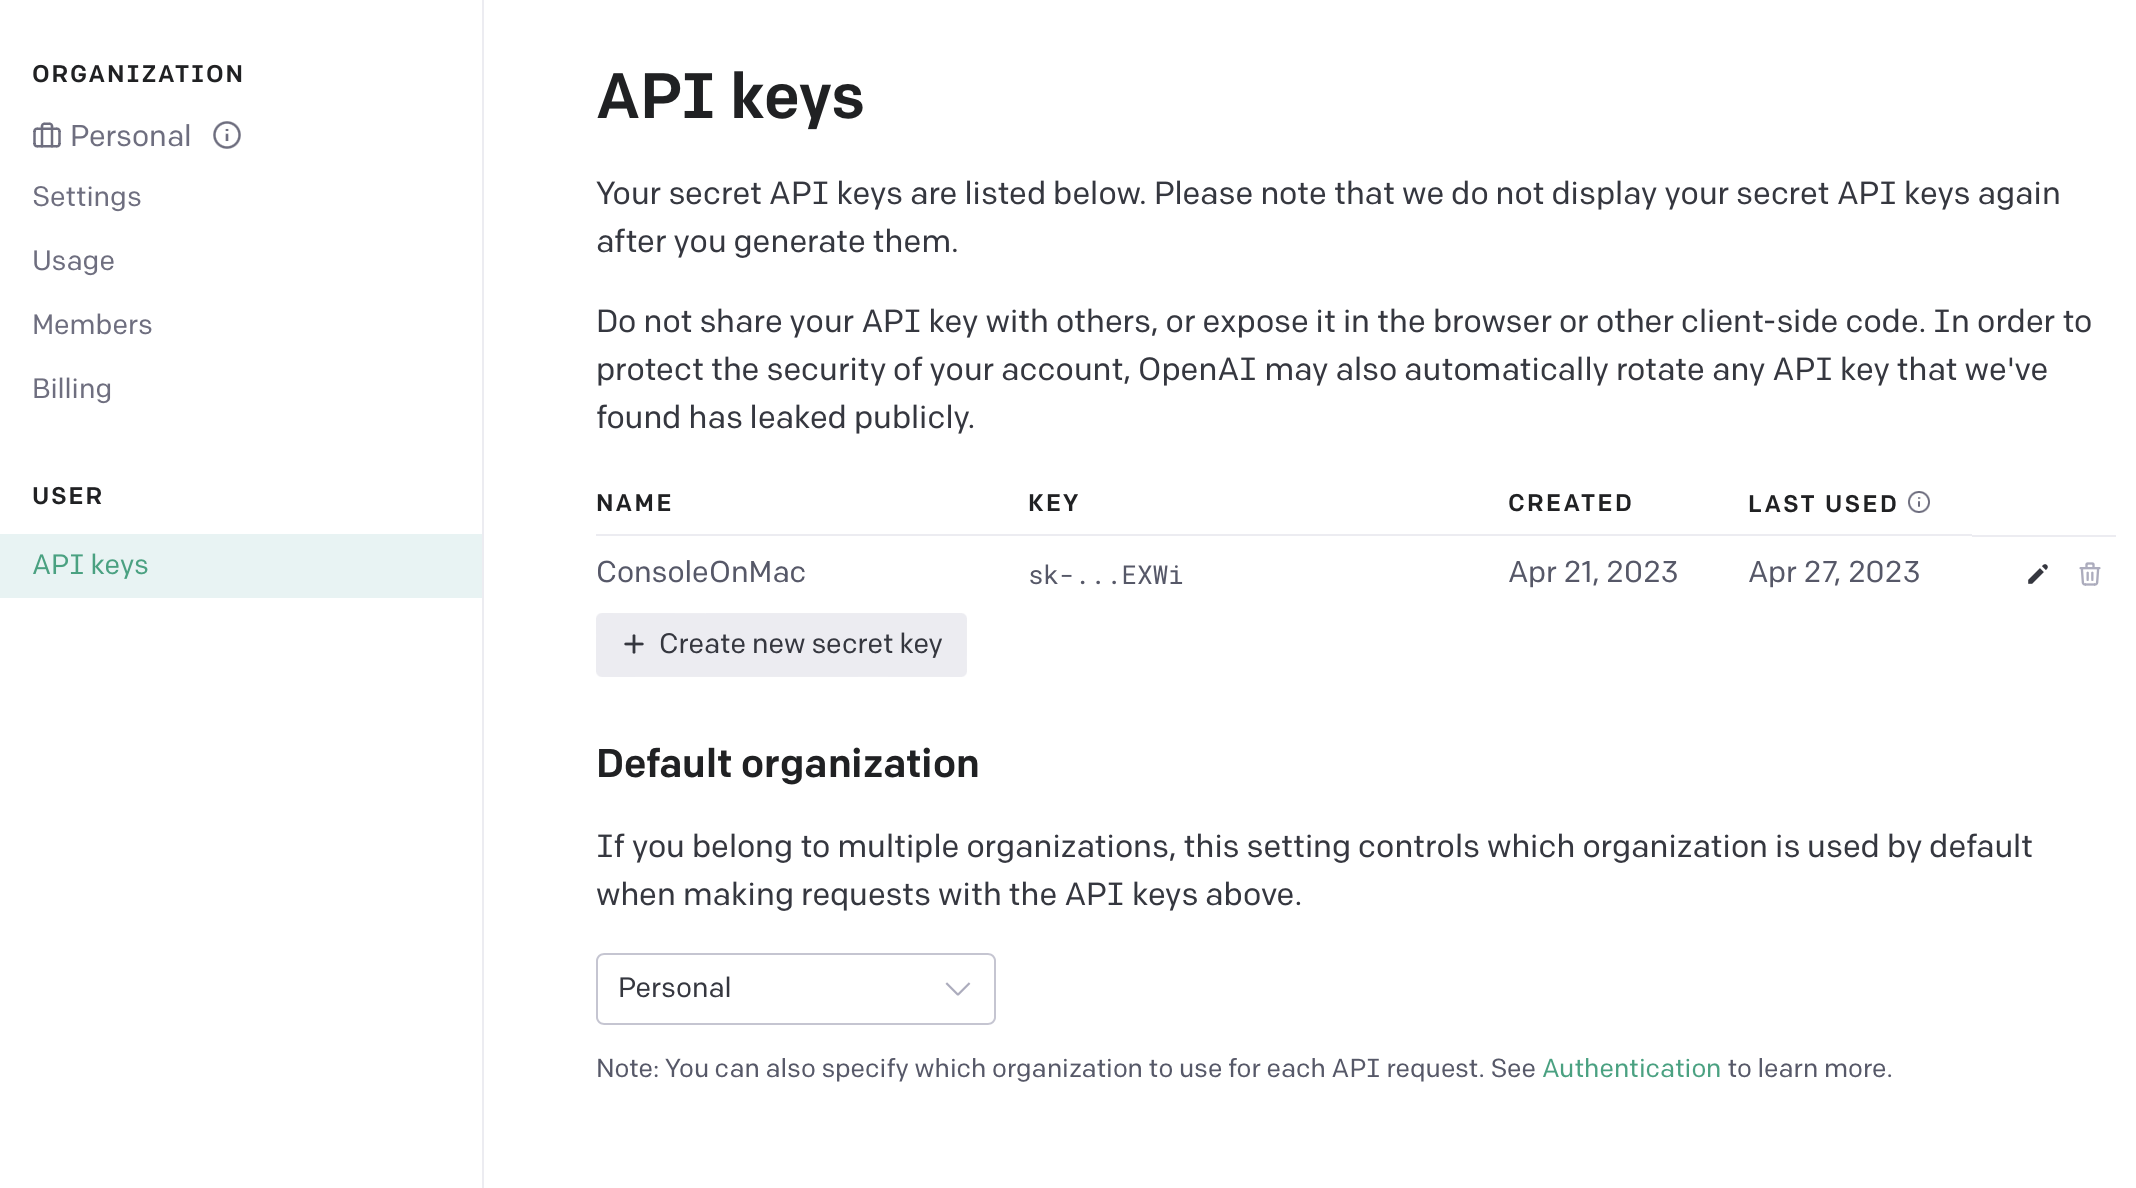
Create an API key
Generate an API key and make sure to save this in your project in a file named .env.
Fun Fact: files or folders with a leading
.are not shown the the user immediately on MacOS or Linux. This is why the folder.gitstores all of the information about a repository and.envcan store environment values. In addition, programs like Visual Studio Code and NetBrains will create configuration files for your project which are hidden.
export OPENAI_API_KEY=/* Your AI key */
Using your API key
Set your API key to a local variable when the user runs your command
const openai = new OpenAI({
  apiKey: process.env["OPENAI_API_KEY"]
});
Because one of ChatGPT’s killer features is the ability to answer new questions using the context of older ones, when we call the API, we not only provide a single question, but also a list of prior questions.
const chatHistory = []; // when the conversation starts, no history is present
Code architecture
Chat GPT is, in effect a series of prompts and responses. Therefore, instead of having a large for loop which handles each prompt, we could alternatively make a prompt function which handles this behavior for us.
The prompt should first ask the user for some text. This is where clark can make both our output and code look much nicer.
async function prompt(){
  const userPromptText = await text({
    message: "What do you want to say?",
    placeholder: `send a message (type 'exit' to quit)`,
    validate: (value) => {
        if(!value) return "please enter a valid prompt"
      }
    });

  // more code to come
}
Now, we have the user’s prompt. Before doing anything else, a quick check to make sure the prompt is not exit is needed before going on.
  if(userPromptText === 'exit'){ // javascript is weird and users triple equals to check for equality. Note using this can lead to some weird bugs
    outro("By, thanks for chatting with us")
    process.exit(0); // 0 means the program did not crash
  })
Now we are ready to start making a request. Using a spinner before going any further provides a visual indication that the program is working. After this, we must add the userPromptText to the chat history. Then, we must make a call to OpenAI to get the response.
// still in prompt

const waitSpinner = spinner();
waitSpinner.start("Thinking...");

chatHistory.push({
    role: 'user',
    content: userPromptText
  })

const generatedText = await getResponse({
    prompt: chatHistory, // the history is the prompt
    openAIKEY
  })
Because ChatGPT takes a few seconds to generate a response, the API gives a stream of data which is shown to the user incrementally (think about the official website). However, dealing with streams in this context is more complicated than necessary, so you are encourage this pre-provided snippet of code.
async function getResponse(chatHistory){
  const completion = await openai.chat.completions.create({
    model: 'gpt-3.5-turbo',
    messages: chatHistory
  })
  return res.data.choices[0].message.content
}
In your process code, you want to first stop your spinner with a message. Then write the text you received as a string to standard output. Then, use a recursive call to make this go on forever.
waitSpinner.stop("text completed")

console.log(generatedText);

console.log('\n\n'); // adding a few new lines

prompt(); // recursive call

// end of prompt
Putting it all together
In case I lost you there, here is the full code for index.js. You are also able to see the full project on Github.
import { cli } from 'cleye';
import { outro, text, spinner } from '@clack/prompts';
import OpenAI from 'openai';

const openai = new OpenAI({
  apiKey: process.env["OPENAI_API_KEY"]
});

const argv = cli({
  name: 'index.js',
  parameters: [
    '[arguments...]',
  ],
})

const chatHistory = [];

let initialPrompt = argv._.arguments.join(' ');

// TODO: Maybe you could find something to do with the initial prompt

async function getResponse(chatHistory){
  const completion = await openai.chat.completions.create({
    model: 'gpt-3.5-turbo',
    messages: chatHistory,
  })

  return completion.choices[0].message.content
}

async function promise(){
  const userPromptText = await text({
    message: "What do you want to say?",
    placeholder: `send a message (type 'exit' to quit)`,
    validate: (value) => {
      if(!value) return "please enter a valid prompt"
    }
  })

  if(userPromptText === 'exit'){
    outro("By, thanks for chatting with us")
    process.exit(0)
  }
  const waitSpinner = spinner();
  waitSpinner.start("Thinking...");

  chatHistory.push({
    role: 'user',
    content: userPromptText
  })

  const generatedText = await getResponse(chatHistory)

  waitSpinner.stop("Generation finished")

  console.log(generatedText)
  console.log("\n\n")

  chatHistory.push({
    role: 'system',
    content: generatedText
  })

  promise();
}

promise();
Summary
This was a very busy activity, but through this, you got initial exposure to many things. Namely:
- Textual User Interface Libraries (TUIs) by using
clarkto make the output of your program much nicer - Creating Command Line Interfaces (CLIs) with
cleyeso this application can be run onMacOS,LinuxandWindows - Using an API wrapper with
openai - Functional Programming by using anonymous functions
- Using
node.jsto run this function
However, this is not a complete program as there are some UI / UX steps we can take to make the output more human readable. A couple of these problems represent good first step to improve your program.
- Using
clarkto display the results of the model - Rendering code block which have
\`` code ```` surrounding to be drawn separately. This behavior comes from the Markdown Syntax Guide
- Implementing all of Markdown highlighting is feasible for this project, but code highlighting can be a good first step.
- Saving
chatHistoryto a file using theJSONfile format and adding the ability to save and load previous conversations.
require('fs')and then usingfs.writeFileSync(location, text)fs.readDir(folder, (err, files) => {/* Process them */})will give you a list of files in a directory as a listJSON.stringify(object)will turn anobjectinto astringJSON.loads(object)will turn astringinto anobjectclackhas amultiselectoption which takes a list of objects withlabelsandvaluesand allows you to accept an option from them
OpenAI has a REST API which is a series of endpoints for starting chats, creating accounts and moe. However, OpenAI also has a node module which wraps the API into a nice set of functions for you and automatically handles the minor processing which you would have had to otherwise implement on your own. It is quite common for more popular APIs to have wrappers in sometimes multiple languages (python, javascript, java are common). Reusing their code can be a great way to save time.